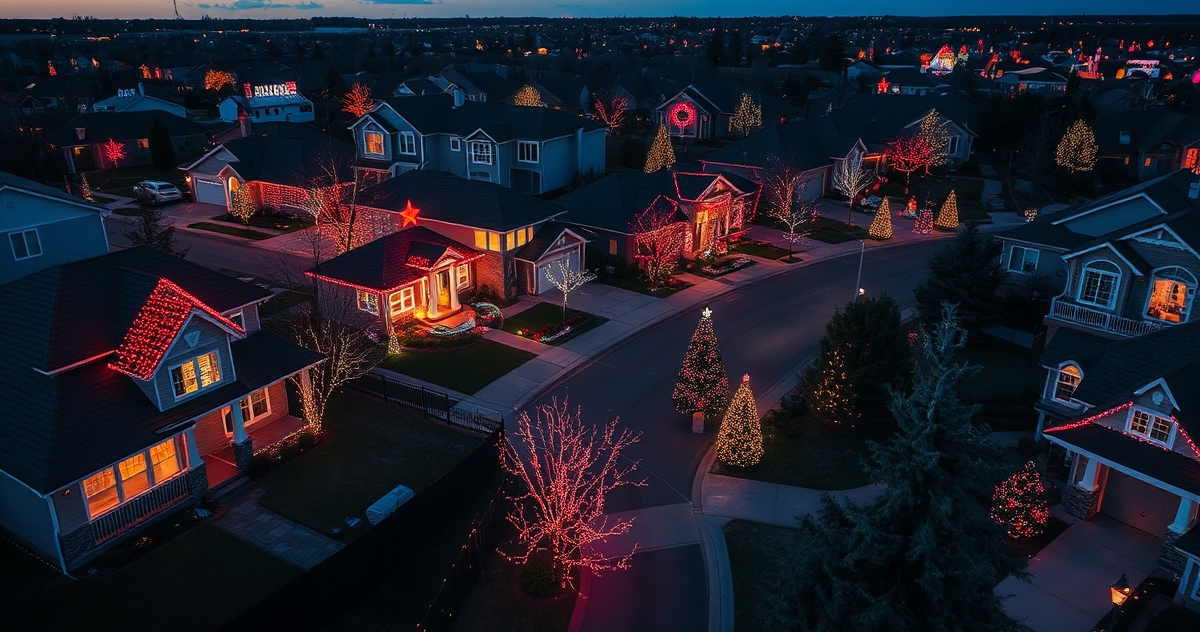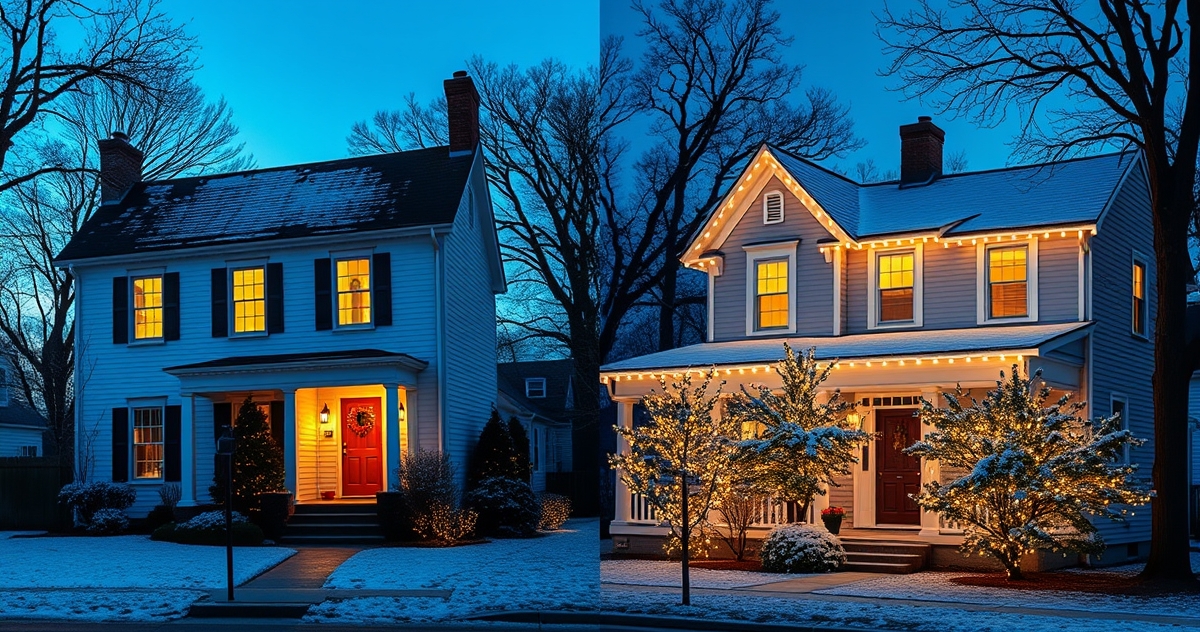
Drive through Newton's historic neighborhoods in December, and you'll immediately notice the difference between amateur and professional Christmas light installations. While some homes have drooping strings with uneven gaps and tangled wires, others showcase perfectly spaced warm white C9 bulbs that follow every roofline curve with mathematical precision. The difference isn't luck or expensive equipment—it's technique.
Learning how to make Christmas lights look professional transforms your holiday display from a weekend DIY project into a stunning seasonal showcase that rivals the polished displays in Brookline's most prestigious neighborhoods. The secret lies in understanding the same methods that professional installers use across Massachusetts, from Lexington's colonial homes to Concord's modern estates.
Choose the Right Bulb Type for Your Architecture
Professional Christmas light installations begin with selecting the appropriate bulb style for your home's architecture and roofline. This fundamental decision affects every aspect of your display's final appearance.
C9 bulbs work best for:
- Traditional colonial and Victorian homes in Newton and Brookline
- Rooflines 20 feet or higher where visibility from the street matters
- Homes with substantial trim work that can support the larger bulb size
- Properties where you want the classic American Christmas aesthetic
Mini lights excel for:
- Contemporary homes with clean lines and minimal architectural details
- Tree wrapping, shrub outlining, and landscape elements
- Layered lighting effects combined with larger bulbs
- Budget-conscious installations covering large areas
Massachusetts professionals often combine both bulb types strategically. A typical Lexington colonial might feature warm white C9 bulbs along the main roofline, with mini lights wrapping the front yard maples and outlining foundation plantings. This layered approach creates depth and visual interest while maintaining the clean, intentional look that characterizes professional work.
Consider your home's scale when choosing bulb size. The grand Victorians along Commonwealth Avenue can handle large C9 bulbs, while smaller Cape Cod cottages often look better with mini lights or a combination approach that doesn't overwhelm the architecture.
Master Professional Spacing Techniques
Consistent spacing separates professional Christmas light installations from amateur attempts more than any other factor. The human eye immediately detects irregular gaps, even when the overall display looks acceptable from a distance.
The 12-inch rule governs most professional roofline installations. Spacing C9 bulbs exactly 12 inches apart creates the classic American Christmas look while ensuring adequate light coverage without overcrowding. This spacing works perfectly for standard residential rooflines in Newton, Brookline, and surrounding Massachusetts communities.
However, architectural features require spacing adjustments:
- Steep rooflines: Reduce spacing to 10 inches to maintain visual density
- Low-pitch roofs: Increase to 15 inches to prevent overcrowding
- Dormers and peaks: Follow the roofline exactly, adjusting spacing to end perfectly at corners
- Gutters with decorative elements: Plan spacing to avoid interference with downspouts and architectural details
Professional installers use measuring techniques that eliminate guesswork. Start by measuring the entire roofline length, then divide by your chosen spacing to determine exact bulb count. This calculation ensures the final bulb lands precisely at the corner, creating the clean termination that marks professional work.
For mini light applications, maintain 6-inch spacing on horizontal runs and 4-inch spacing when wrapping vertical elements like porch columns or tree trunks. These tighter spacings create the dense, even glow that characterizes high-end installations throughout Massachusetts.
Use Commercial-Grade Clips and Hardware
The difference between drooping lights and perfectly aligned displays lies in the clips and hardware supporting your installation. Professional installers across Massachusetts rely on commercial-grade mounting systems that maintain consistent positioning through wind, ice, and snow.
Gutter clips are the foundation of professional roofline lighting. Quality clips feature:
- Tight grip mechanisms that won't slip under wind load
- Weather-resistant materials that survive New England winters
- Consistent height positioning that keeps bulbs perfectly aligned
- Easy removal systems that prevent gutter damage during takedown
Avoid the temptation to use staples, nails, or generic hardware store clips. These shortcuts create the uneven, unprofessional appearance that marks amateur installations. Professional-grade clips cost more initially but pay dividends in appearance quality and long-term durability.
Magnetic clips work exceptionally well for metal gutters common on many Concord and Lexington homes. These systems provide strong holding power without any roof penetration, making them ideal for homeowners concerned about warranty issues or structural integrity.
For brick and stone applications common in Massachusetts architecture, use masonry clips designed specifically for these materials. Never attempt to drill into brick or mortar without proper equipment and experience—this approach often leads to expensive repairs and water infiltration issues.
Tree wrapping requires specialized techniques:
- Use brown or green wire to minimize visibility against bark
- Wrap in consistent spirals, maintaining 6-inch vertical spacing
- Avoid wrapping too tightly, allowing for trunk expansion
- Secure connections at eye level where they're easily accessible for maintenance
How to Make Christmas Lights Look Professional: Layering and Design
Professional Christmas light displays in Newton's most prestigious neighborhoods share one common characteristic: thoughtful layering that creates visual depth and interest. Understanding how to layer different light types and colors elevates your installation from simple decoration to sophisticated holiday artistry.
The three-layer approach forms the foundation of professional design:
Layer 1: Architectural Outline
Primary rooflines, doors, windows, and major structural elements receive the main lighting treatment. This layer typically uses C9 bulbs in a single color—warm white creates elegant sophistication, while multicolor adds festive energy appropriate for family-focused displays.
Layer 2: Landscape Integration
Trees, bushes, and garden elements receive secondary lighting that complements the architectural outline. Mini lights work excellently for this layer, often in the same color family as the primary installation but potentially in a different shade or intensity.
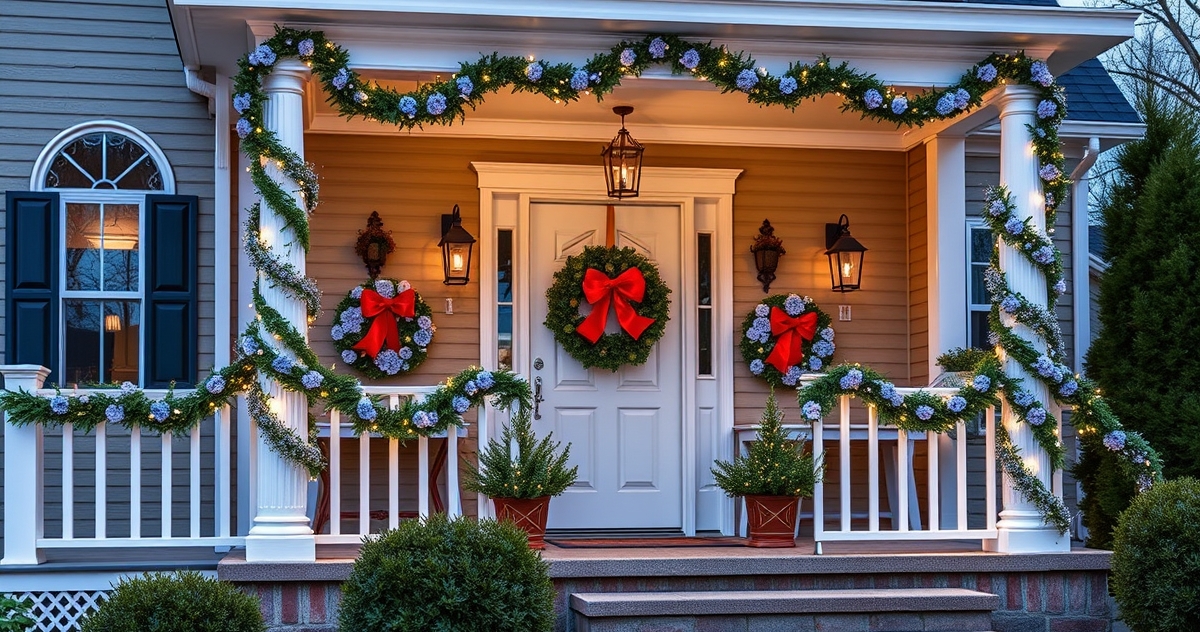
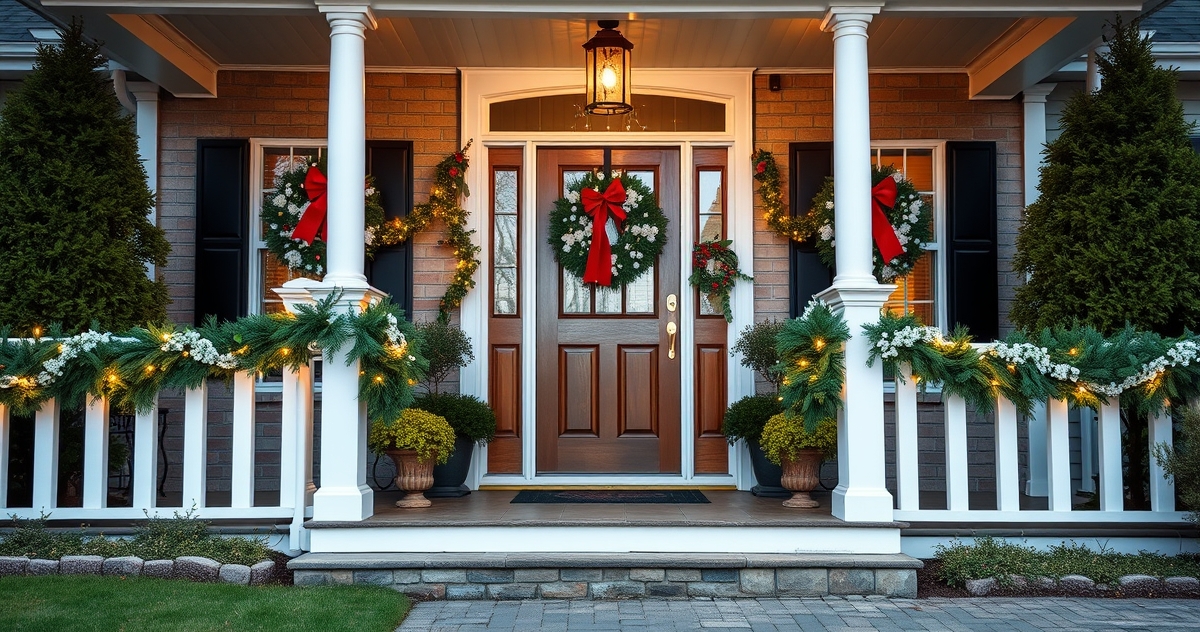
Layer 3: Accent Details
Garlands, wreaths, and specialty elements provide finishing touches that complete the professional appearance. This layer might introduce complementary colors or textures that enhance the overall design without competing with the primary elements.
Professional installers plan these layers simultaneously, ensuring color harmony and visual balance across the entire display. A typical Brookline colonial might feature warm white C9 bulbs on the roofline, warm white mini lights wrapping the front maples, and garlands with red bows framing the front door and first-floor windows.
Color coordination principles:
- Monochromatic schemes: All warm white or all cool white creates sophisticated elegance
- Traditional combinations: Red and green or red and white for classic Christmas appeal
- Modern palettes: Cool white with blue accents for contemporary architecture
- Avoid color conflicts: Never mix warm and cool whites in the same visual field
Perfect Your Installation Technique
The physical installation process separates professional-quality results from amateur attempts. Even perfect planning fails if execution lacks attention to detail and proper technique.
Start with thorough preparation:
- Test all light strings before installation to avoid frustrating discoveries on the roof
- Plan your electrical connections to minimize visible extension cords
- Check weather forecasts—avoid installation during predicted wind or precipitation
- Gather all tools and materials before beginning to maintain workflow efficiency
Follow professional installation sequence:
Step 1: Install clips first
Position all gutter clips and mounting hardware before running any lights. This approach ensures consistent spacing and eliminates the temptation to adjust clip positions to accommodate lighting irregularities.
Step 2: Run power feeds
Establish your electrical connections and run extension cords along their final paths. Hide cords behind downspouts, along foundation lines, and through landscaping wherever possible.
Step 3: Install lights systematically
Work from power source outward, installing one complete section before moving to the next. This methodology prevents tangling and ensures each section receives proper attention.
Step 4: Secure all connections
Waterproof all outdoor connections using appropriate covers and seal techniques. Massachusetts winter weather demands complete protection from moisture infiltration.
Professional installers maintain consistent tension throughout their installations. Lights should follow rooflines and architectural features smoothly, without sagging between mounting points or pulling tight enough to stress connections.
Common amateur mistakes to avoid:
- Installing clips as you go rather than positioning them all first
- Using inadequate extension cords that create voltage drop and dim lighting
- Mixing old and new light strings that create color temperature variations
- Failing to secure connections properly, leading to mid-season failures
Professional Maintenance and Troubleshooting
Professional-quality Christmas light displays maintain their appearance throughout the entire holiday season. Understanding proper maintenance techniques ensures your installation continues looking pristine from Thanksgiving through New Year's Day.
Weekly maintenance schedule:
- Visual inspection: Walk your property's perimeter checking for burned-out bulbs, loose connections, or weather damage
- Bulb replacement: Replace failed bulbs immediately to prevent cascading failures in series-wired strings
- Connection check: Verify all outdoor connections remain secure and weatherproofed
- Timer verification: Ensure automatic timers continue operating correctly
Massachusetts weather presents unique challenges for holiday lighting systems. Ice accumulation can stress connections and mounting hardware, while temperature fluctuations cause expansion and contraction that loosens fittings over time.
Weather-specific maintenance:
- After ice storms: Inspect for damaged bulbs and stressed mounting points
- Following high winds: Check for loose connections and shifted light positioning
- During temperature swings: Verify all connections remain secure as materials expand and contract
Professional installers stock replacement bulbs and fuses for immediate repairs. Keeping spare components readily available prevents minor issues from becoming display-ruining failures during peak holiday entertaining periods.
Many Massachusetts homeowners discover that achieving truly professional results requires significant time investment and specialized knowledge. Professional installers bring years of experience, commercial-grade equipment, and comprehensive insurance coverage to every project.
When to Consider Professional Installation
While dedicated homeowners can achieve impressive results using these techniques, certain situations warrant professional installation services. Understanding when DIY approaches reach their limits helps you make informed decisions about your holiday lighting investment.
Complex architectural features challenge even experienced DIY installers. Multi-story homes, steep rooflines, and intricate trim work require specialized equipment and safety protocols that professionals handle routinely. The colonial and Victorian homes throughout Newton and Brookline often feature architectural complexity that benefits from professional expertise.
Large-scale installations quickly become overwhelming for weekend projects. Properties requiring more than 1,000 feet of lighting or multiple building structures benefit from professional planning and installation capabilities. Professional crews complete in hours what might take homeowners entire weekends.
Safety considerations top the list of professional installation benefits. Working on rooflines during Massachusetts winter conditions presents significant risks that professionals mitigate through proper equipment, training, and insurance coverage. No holiday display justifies personal injury risks.
Time constraints affect many busy Massachusetts families. Professional installation eliminates the weekend time commitment while ensuring expert results. Professional crews typically complete residential installations in 4-6 hours, compared to 15-20 hours for comparable DIY projects.
Holiday Lights Decor Massachusetts brings 18 years of experience to every installation, combining professional-grade equipment with detailed knowledge of Massachusetts architecture and weather conditions. Our residential lighting services transform homes throughout Greater Boston, MetroWest, and beyond into stunning holiday showcases.
Professional installation also includes comprehensive maintenance and removal services, eliminating the post-holiday storage and equipment management that many homeowners find burdensome.
Frequently Asked Questions
What spacing should I use for professional-looking Christmas lights?
Use 12-inch spacing for C9 bulbs on standard rooflines, adjusting to 10 inches for steep pitches and 15 inches for low-pitch roofs. Mini lights require 6-inch spacing on horizontal runs and 4-inch spacing for vertical wrapping. Consistent spacing throughout your installation creates the uniform appearance that characterizes professional work.
How do I choose between warm white and cool white Christmas lights?
Warm white lights complement traditional architecture like colonials and Victorians common in Newton and Brookline, while cool white suits contemporary homes with modern design elements. Never mix warm and cool whites in the same visual field, as the color temperature difference creates an unprofessional appearance.
What type of clips should I use for professional Christmas light installation?
Commercial-grade gutter clips provide the most professional results for roofline installations. Avoid staples, nails, or generic hardware store clips that create uneven positioning. Magnetic clips work well for metal gutters, while masonry clips suit brick and stone applications common in Massachusetts architecture.
How many lights do I need for my roofline?
Measure your roofline length in feet and divide by your spacing choice (typically 1 foot for C9 bulbs or 0.5 feet for mini lights). Add 10% for corners and architectural features. A 100-foot roofline requires approximately 110 C9 bulbs spaced 12 inches apart.
When should I hire professional Christmas light installers?
Consider professional installation for multi-story homes, complex architectural features, installations exceeding 1,000 feet of lighting, or when safety concerns exist. Professional installers complete work faster, provide maintenance services, and include comprehensive insurance coverage for your protection.
Transform your Massachusetts home into a professional holiday showcase this season. Whether you tackle the installation yourself using these proven techniques or prefer the expertise and convenience of professional services, the key lies in attention to detail and commitment to quality. Contact Holiday Lights Decor Massachusetts for a free consultation and discover how professional installation can elevate your holiday display beyond your expectations.